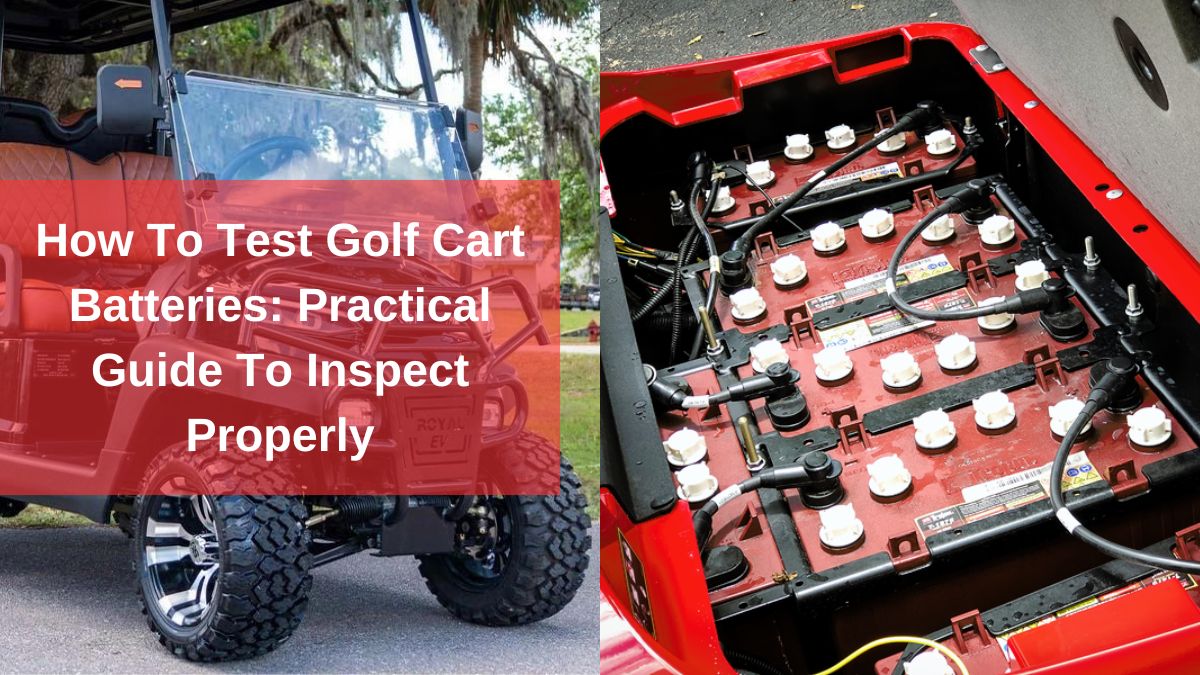
How To Test Golf Cart Batteries: Practical Guide To Inspect Properly
In this article, I have explained how to test golf cart batteries by following simple procedures and tools to make sure that your golf cart batteries work properly!
Nowadays, using a golf cart for daily transportation is not uncommon. Apart from their practical use on golf courses, they are now widely used on public roads because of their peaceful ride experience and low fuel/energy consumption.
And to make sure that you’re getting a smooth ride, testing your golf cart batteries regularly is significant. This not only helps with identifying potential damages but also ensures that your golf cart battery lasts longer.
In this guide, you will learn how to test golf cart batteries by following the simple steps and methods that I mentioned below.
How To Test Golf Cart Batteries: 6 Easy Ways
Inspecting golf cart batteries requires precautionary measures and proper guidance to ensure that you don’t end up hurting yourself. Below, I have provided six easy ways to test golf cart batteries without any hassle.
1 – Visually Inspecting For External Damages
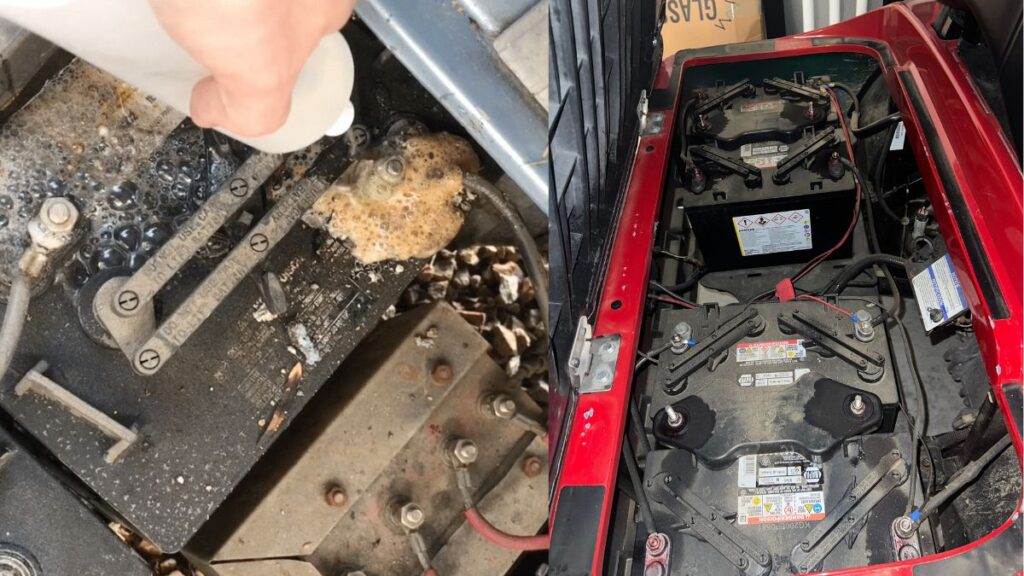
Start by inspecting your golf cart batteries for external damages. Look for any leakages, corrosion, or damage to the battery case. You may have a crack in your battery case which is impacting the golf cart’s performance.
Have a look at the cable and double-check that the terminals are properly tight, clean, and corrosion-free. In the second case, if you see a liquid coming out or your golf cart battery is covered in a dried white substance, there’s a possibility of leakage. Try to fix the leakage or replace it as soon as possible.
The best way to clean corrosion is by using a brush and a mixture of baking soda and water. Gently rinse off the water, clean the batteries, and let it dry for a while.
2 – Check The Water Level
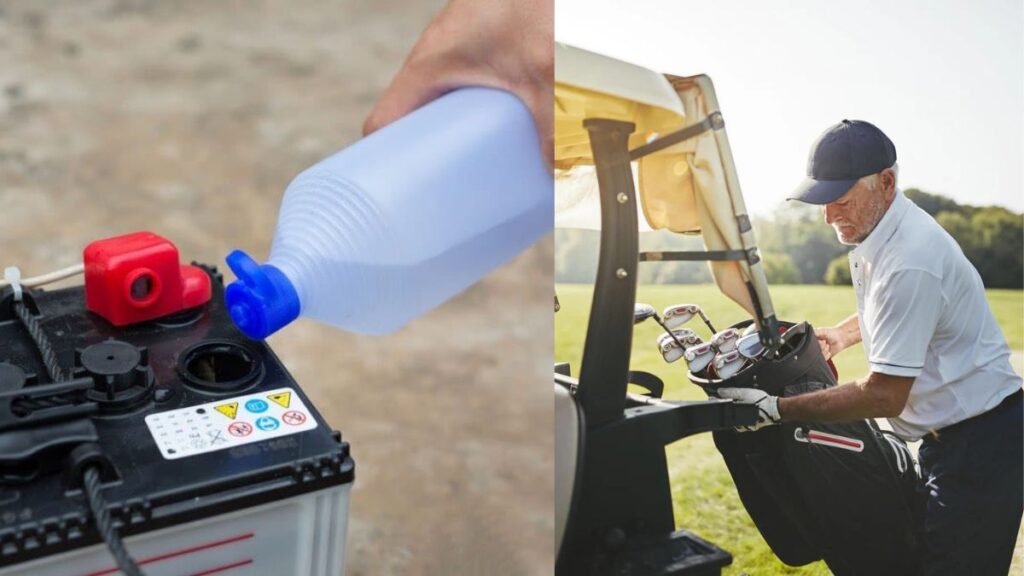
Another common way of inspecting your golf cart battery is to check the water levels. In some cases, people forget to check the water level due to a busy schedule or other reasons. But, not checking the water levels may result in serious consequences.
However, neglecting this important factor may result in inadequate battery performance, overheating issues, and accelerated corrosion. So, if you are a guy like me who regularly drives a golf cart, check the battery water level regularly.
This will help you improve the longevity of your golf cart batteries because nowadays, they are quite expensive to replace. Also, use these safety measures while checking your golf cart battery water levels:
- Do not overfill the water as it will cause a water overflow which can damage the battery
- Use distilled water instead of normal tap water to level up the battery water, because distilled water does not carry any impurities. Using tap water regularly increases the chances of building residue inside or outside the battery.
You May Also Like Reading: How Much Does A Golf Cart Weight?
3 – Voltage Testing By Using A Multimeter
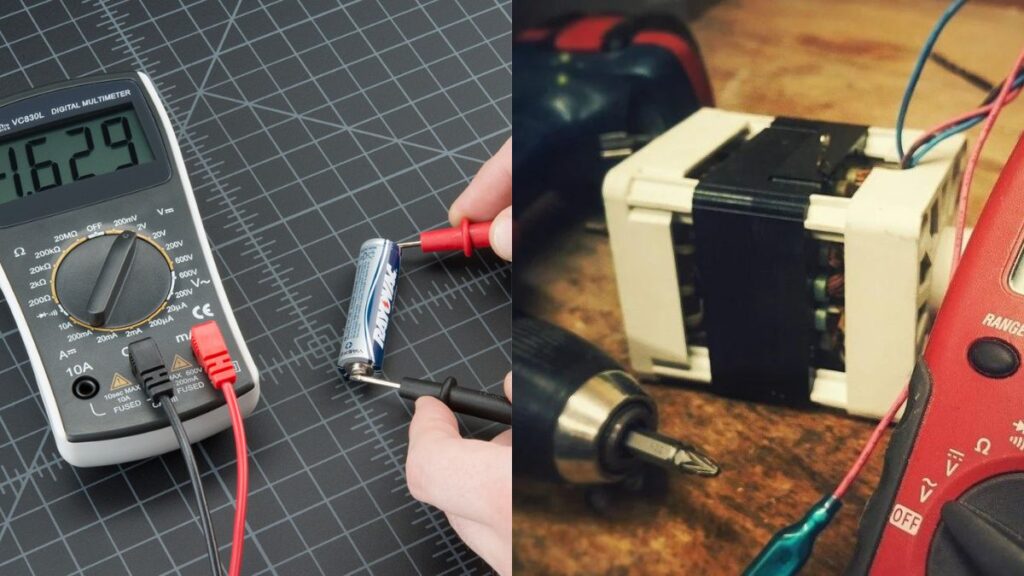
Voltage testing is another widely used method to check golf cart batteries. In this method, you measure the voltage of each battery individually. Here’s how you can do it with proper safety:
- Wear a protective glove and eyewear to avoid accidental exposure to battery acid.
- Ensure that the batteries are detached from the golf cart, and it’s turned off
- Take a multimeter and adjust it to the DC voltage setting.
- Ensure that the equipment you’re using is capable of measuring voltage current between 6V to 8V for golf cart batteries.
- Start testing each battery individually by attaching the multimeter’s positive and negative probe on the positive and negative terminals respectively.
- Take the readings displayed on the digital meter.
Read the below table to compare the readings for analysis:
| For a 6-volt battery | A fully charged battery should read around 6.4 to 6.6 volts |
| For an 8-volt battery | A fully charged battery should read around 8.3 to 8.5 volts |
| For 36-volt batteries | The reading should be around 37.5 to 39 volts |
| For 48-volts battery | It should be around 50 to 52 volts |
If you get any readings significantly lower than I mentioned above, there’s possibly something wrong with your golf cart batteries.
4 – Using A Hydrometer
Golf cart batteries run on electrolyte mixtures. Any instability in their levels can result in massive performance downfall, especially when you’re driving an electric golf cart. However, this method is only applicable if you are using lead-acid batteries.
With the help of a hydrometer, you can test the exact gravity of your electrolyte solution. If you get readings around 1,280 gravity, then your battery is working in good condition and does not need a replacement.
But, if the numbers significantly change, I would suggest you change your batteries or fix the issue. You can easily find a hygrometer at your local hardware store. No matter which type of hydrometer you choose, make sure you have read its safety instructions carefully for safe testing.
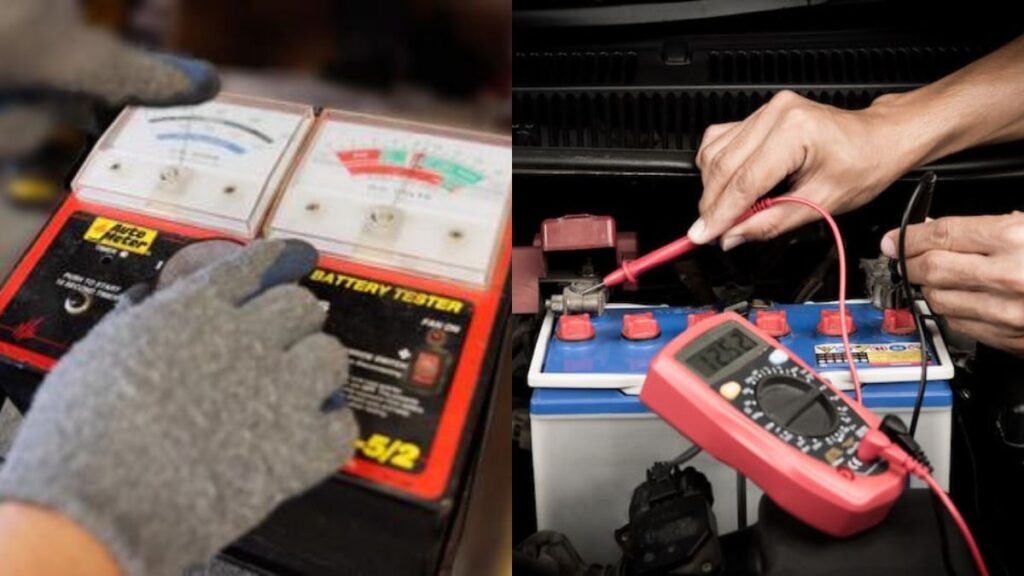
5 – Load Testing
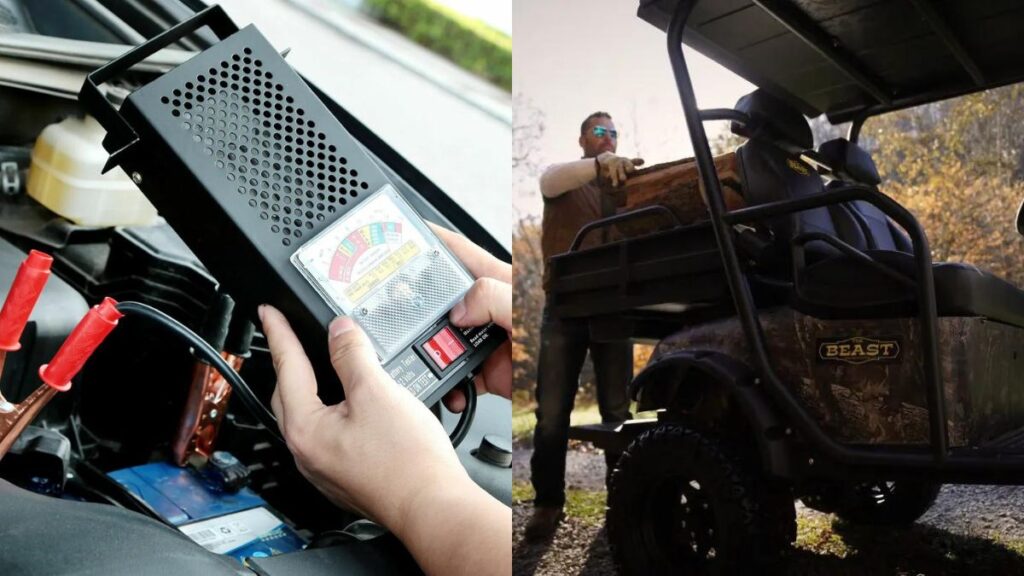
The load testing is a slightly advanced method of golf cart battery testing. This method can be done using a battery load tester.
It’s a common practice that you can see anywhere in automotive and golf cart workshops. The main purpose of load testing is to test and analyze the sustainability of a battery regarding how much load it can carry while considering its overall capacity.
However, if you see a significant difference i.e. a drop in loading capacity, then it indicates that your battery capacity is less and you may need to replace it.
I’ve attached a link to a Youtube tutorial that will help you load testing your golf cart batteries:
6 – Consider A Professional For Battery Testing
It’s always the best option to test your golf cart batteries by yourself if you have the right tools and proper knowledge to get the job done. But, in case things are out of your hands, it’s a wise move to call a professional for battery testing.
Having a professional hand to check your battery status will do two things for you:
- Seeing how they do it will let you know what tools you need and how to use them properly to check by yourself next time.
- They will give you accurate information about the current condition of your golf cart batteries.
You can find a local service to test golf cart batteries for affordable rates!
How To Test A 6 Volt Battery?
To test a 6-volt battery, there’s a simple way given which I have already explained above. You can use a multimeter to test your 6-volt battery. For measuring current, and resistance in electrical circuits.
Follow the below simple methods:
- Adjust the settings of your multimeter to DC voltage. After that, set the range higher than 6V. For an average 6-volt battery, you can set the range up to 20 volts DC.
- Now, connect the leads of the multimeter to the positive and negative terminals respectively. Ensure that the connection is secure, and leads are making good contact with the terminals.
- Observe the readings you get from the multimeter. A fully charged 6V battery would give you readings around 6.3 to 6.5 volts.
- Test it multiple times. If the voltage is less than usual, your battery is faulty or working in a bad condition.
You can also check the below video that I mentioned to you on how to test a 6 Volt battery:
How To Tell If A Golf Cart Battery Is Dead?
It becomes a real problem when your golf cart suddenly stops working and you are stuck somewhere. Despite an embarrassing moment, it can be problematic during extreme weather conditions.
To make sure this doesn’t happen to you, it’s important to regularly check your golf cart batteries, but what if your golf cart batteries are already dead? In general, a golf cart battery can suddenly stop working due to several reasons, such as a bad electric connection, a short circuit, a broken wire, using a faulty switch, etc.
Below, I have provided two primary signs you need to replace a golf cart battery:
1 – Charging Issues
If your golf cart battery is taking a longer time to charge than usual. It means that your battery is dying. You can either inspect it to see if the problem can be fixed or replace it. In another case, it may charge properly and everything seems perfect.
But, observe whether your golf cart is holding the charge as it used to be.
2 – Decreased Performance/ Output
Whether you’re using an electric or a gas golf cart, if the performance is decreased, the first thing you should check is the battery. For an electric model, test your battery capacity by giving your cart full throttle. If it takes a while or doesn’t launch as before, it’s a sign your battery is going to be dead.
In another case, if your golf cart is struggling to ride on steep inclines, you can notice the difference
Should I Leave My Golf Cart Plugged In All The Time?
Keeping your golf cart plugged in all the time is not a healthy practice. It’s important to charge it properly, but overcharging your battery can impact health and performance.
I would recommend you read the manufacturer manual for guidelines about how often you should charge. Reading these guidelines is mandatory because different types of batteries come with different charging requirements.
How Long Do Golf Cart Batteries Last?
Like every other electrical appliance, golf cart batteries also come with a specific age. When it comes to the lifespan of a golf cart battery, factors like usability and maintenance matter a lot.
In general, a well-maintained golf cart battery can last between 5 to 8 years. However, the frequent charging and the manufacturer you choose for your battery also contribute a lot to the longevity of a golf cart battery.
If you want to know more about how long do golf cart batteries last, and how you can maintain them, read this article!
When You Should Replace Golf Cart Batteries: How To Do It Yourself
As I said before, a golf cart battery comes with a lifespan of 5 to 8 years. But, if it’s not keeping up with that range, there are three signs you should consider to replace golf cart batteries:
1 – Not Working To Its Full Capacity
If you feel that your cart is underpowered or takes a longer time to charge it’s a sign of reduced capacity. In addition, there are several other factors like, unable to cover the same distance as before in a single charge or slower acceleration.
2 – Swelling Or Leakage
If you are noticing visible signs of damage such as acid leakage, cracks, or bulging, it means that your battery needs an immediate replacement. The cracks and leakage can be caused by:
- Overcharging your battery (letting it charged all the time during the night)
- Improper installation
- Parking your cart in extreme temperatures (under direct contact with the sun)
3 – Unusual Reading While Testing
Last but not least, if you are constantly getting miscalculations and uneven readings on a multimeter after charging it fully., you may need to replace your battery.
However, if you are experiencing this problem during the start of your season or you just recently changed your battery, I recommend you consult your manufacturer.
Conclusion
So, how to test golf cart batteries? I hope that I have explained it pretty well. There are several ways you can use it to test your golf cart batteries.
However, considering professional help for inspecting your expensive batteries is always a good option. Make sure that you regularly check your battery and maintain the proper water levels that are required.
If it’s not working to full capacity, or causing any trouble, try to fix the issue. Otherwise, the only option you have is the battery replacement.
You May Also Like Reading:
- Are Golf Carts Street Legal?
- Do Golf Carts Have Titles?
- How Fast Do Golf Carts Go?
- How Many Wheels Does A Golf Cart Have?
- How To Buy A Golf Cart: Comprehensive Guide
- How To Transport A Golf Cart
- Icon Golf Cart Review: Top 10 Models
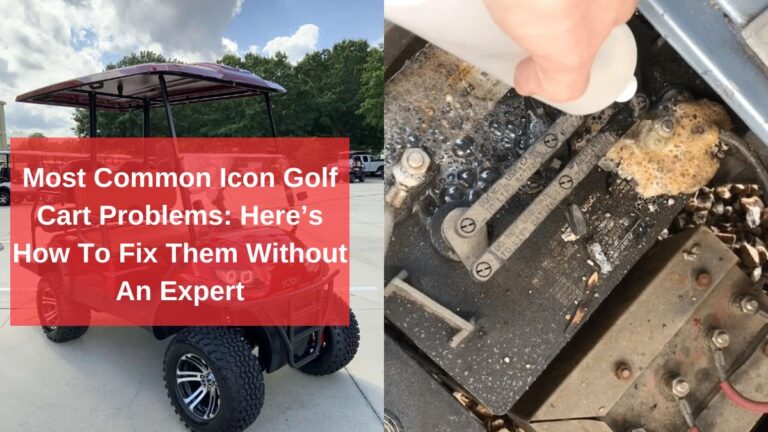
- 6 Most Common Icon Golf Cart Problems
- How To Test A Golf Cart Battery Charger
- Hunting Golf Carts: Complete Guide

I’m Khawar Iqbal, Founder of Golfsportal. I’m excited to be your guide in the world of Golf. At Golfsportal, I will keep you updated with insightful information that will help you improve your golfing experience and knowledge about what’s currently happening in the industry.