Golf Simulator Projector Setup – Comprehensive Guide
Golf simulators have come a long way, and setting up the perfect projector for your simulator can make or break the experience. We’ve been through it all, made the mistakes, learned the hard lessons, and now we’re here to guide you.
This guide isn’t just about throwing technical jargon at you. We’re keeping things simple, direct, and as clear as a sunny day on the course. So, whether you’re a beginner or looking to upgrade, we’ve got you covered.
Why Does Your Projector Setup Matter?
Let’s start with the big question: Why is a proper projector setup essential? Well, imagine teeing off and the ball smashing into the screen, but the image looks off—blurry, dim, or worse, misaligned. Not fun, right?
A good projector setup brings your simulator to life. We’ve seen the difference between setups that take time versus ones rushed out of excitement. Trust us, you’ll enjoy every swing more when the visuals are crisp, the size is right, and the whole thing runs smoothly.
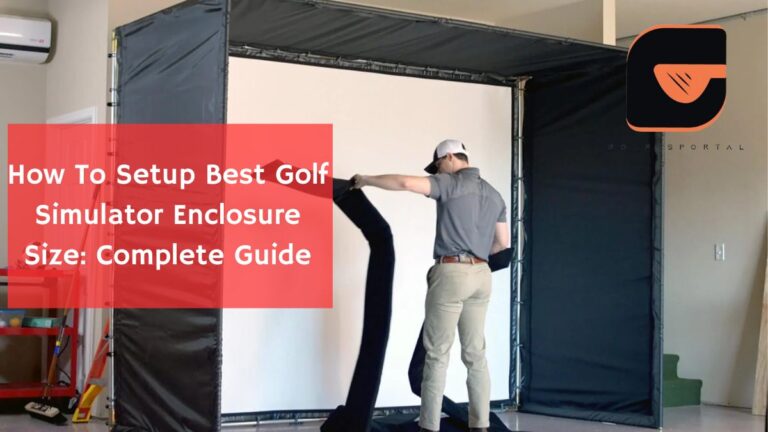
You May Also Like: How To Setup Best Enclosure Screen Size
How to Setup a Golf Projector? (Step-By-Step Guide)
1. Picking the Right Projector for Your Space
This might feel like choosing a driver—so many options, so much to think about. But don’t worry, we’re here to simplify. There are two main types of projectors you’ll be looking at short-throw and standard-throw.
Short-Throw Projectors (The Best for Tight Spaces)
We use short-throw projectors because they’re perfect for smaller rooms. They need less distance from the screen, so if your setup is in the basement or garage like ours, this is your winner. With short-throw projectors, you can position the projector 6-7 feet away from the screen and still get a large, bright image. The Optoma GT1090HDRX is a fantastic option here, offering a balance of brightness and picture quality.
Short-throw projectors give you that immersive feel even if you don’t have 15 feet of space behind you. And no worries about shadows—trust us, there’s nothing worse than swinging and seeing your shadow messing with the visuals.
Standard-Throw Projectors
Got more space? Standard-throw projectors might be your go-to. They need to be placed further from the screen, usually around 10-15 feet. While they work great for larger rooms, you’ve got to be precise. One mistake we made early on was placing the projector too far back, and let’s just say it created more problems than solutions.
Our Take: Standard-throw projectors work best if you’ve got the room for them. If you’re setting up in a wide-open basement or garage with tons of room, this might be perfect for you. The BenQ LU710 is a solid pick with its zoom feature, letting you adjust the throw distance if needed.
2. Keep Aspect Ratios and Screen Sizes Into Consideration
Now, let’s talk about those black bars that can ruin your viewing experience. You don’t want your golf ball flying into an image that only fills part of the screen. It’s all about getting the aspect ratio right.
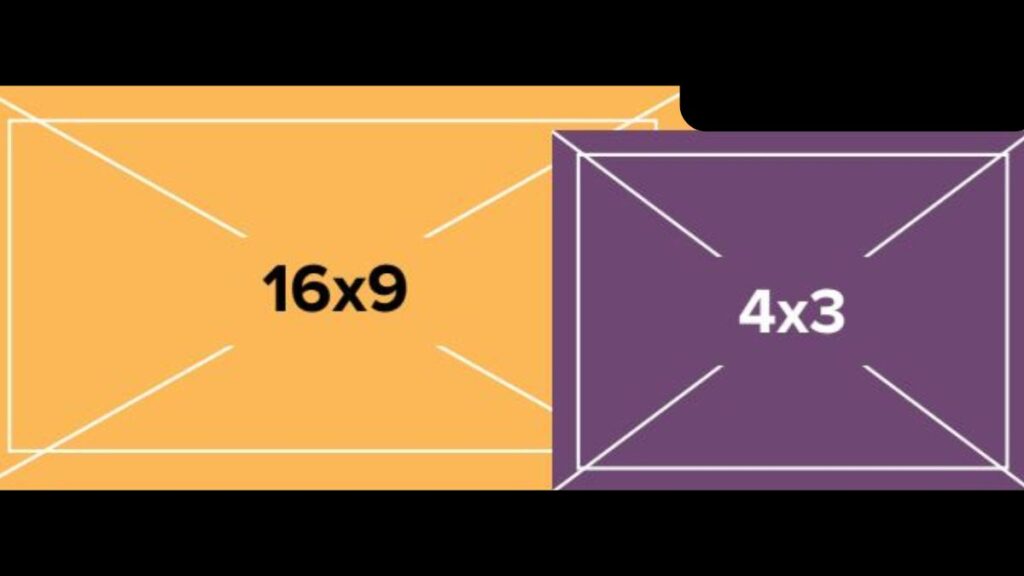
16:9 vs. 4:3
We’ve tried both, and here’s what we learned. If you’ve got a screen that’s more square (like 10×10 feet), a 4:3 aspect ratio is your best bet. But for wider screens, stick to 16:9. We once used the wrong ratio, and let’s just say it wasn’t pretty—black bars on top and bottom, and the image felt squished.
Our Suggestion: Use the height of your screen to determine the best aspect ratio. Aim for full-height coverage first. If you’re unsure, you can adjust your projector settings or custom resolutions through your computer’s settings.
3. Projector Placement – Where Should It Go?
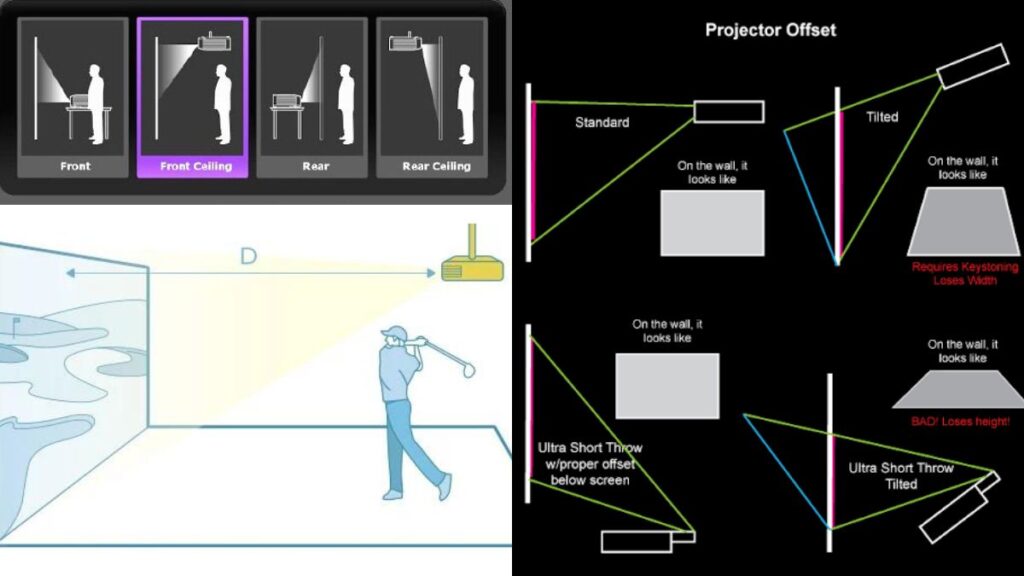
Mounting your projector is like setting up your tee. Get it wrong, and it’ll affect everything. Get it right, and you’re in for a smooth ride.
Ceiling Mount vs. Floor Placement
Ceiling mounting is ideal. Why? Because it keeps the projector out of the way. We mount ours above the ball line—perfect for avoiding shadows. If you place it right, even the tallest golfer in your group won’t cast a shadow on the screen. We’ve also tested floor setups, but honestly, it just gets in the way. A badly placed floor projector will have you tripping, and no one wants that.
Use a laser level to get the perfect angle. You’ll want to set it up so the image hits just right—filling the entire height of the screen. Don’t worry about width yet; we’ll adjust that later.
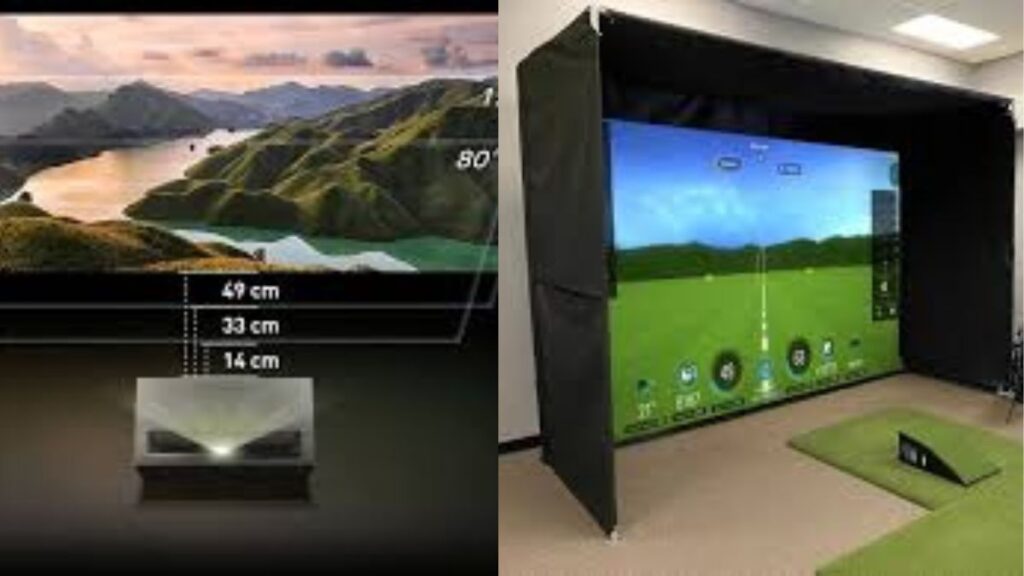
4. Calculating Throw Distance
This is where people often get stuck. We’ve worked with various distances, and here’s what works best:
- If you’re using a short-throw projector, it can be as close as 7 to 8 feet from the screen.
- For standard throw projectors, you’ll want to place it at least 12 to 15 feet back.
Keep in mind that being too close can lead to shadows while being too far can reduce image brightness. I’d suggest the sweet spot around 10 feet from the screen for most setups, but this will vary based on your room size and the projector model.
5. Fine-Tune the Projector Settings
Once your projector is mounted, it’s time to get the image looking perfect. This is where the fun begins.
Adjusting Zoom and Keystone
We always aim to use as little zoom and keystone correction as possible. Why? Because too much adjustment can distort the image. We once relied too heavily on keystone correction, and it messed up the clarity.
Minimal adjustments keep the image sharp. Zoom is handy for flexibility, but if you can set it up so that you don’t need it, you’re winning.
Custom Resolutions
We love a full-screen image, and you should too. If your projector’s default settings leave black bars or an off-centered image, it’s time to dive into custom resolutions. On a PC, we use Nvidia’s control panel to tweak the settings. This is where you make sure your image fills the screen without cutting off any important details.
How We Do It? Adjust the width while keeping the height intact. For example, with a 1080p projector, keep the vertical pixels at 1080 and reduce the horizontal until it fits your screen.
You May Also Like Reading: Beginner’s Guide To Using A Golf Simulator
6. Calibrating Brightness, Contrast, & Focus
Let’s talk about calibration. This is where the image goes from “okay” to “wow.” We always spend some time calibrating the brightness, contrast, and focus.
We like a bright image because golf simulators are often in rooms with some ambient light. For the best results, aim for a projector with at least 3000 lumens. Anything less, and the image starts looking dim, especially on those bright white impact screens.
If your room has windows or lights, focus on brightness over resolution. A bright image makes it easier to track the ball’s flight and feel fully immersed.
Troubleshooting Common Setup Issues
Even when you think you’ve done everything right, things can go wrong. But don’t worry, we’ve been there, fixed that.
Black Bars and Image Cropping
If you see black bars, don’t panic. It’s usually a simple fix. We made this mistake early on—our image only filled part of the screen. The solution? Adjust the aspect ratio or resolution settings on your computer.
If your projector’s settings aren’t cutting it, head into your computer’s display settings. Adjust the resolution manually until the image fits perfectly.
Handling Shadows
Shadows are the bane of any simulator setup. We had our fair share of issues before figuring it out. The key is making sure the projector is far enough in front of you to avoid casting a shadow. Ideally, mount it directly above or slightly ahead of the ball.
Avoid placing the projector more than 12 feet behind the ball. Any further back, and you’ll likely have shadow problems.
You May Also Like: 10 Must-Have Indoor Golf Simulator Accessories
Benefits of a Well-Set-Up Golf Simulator Projector
We’ve noticed several key benefits to having a properly installed projector:
- Immersive Experience: A well-positioned projector makes the simulation feel more lifelike. We love how it draws us into the game.
- Versatility: You can use the projector for more than just golf—think movie nights or family entertainment.
- Enhanced Performance: With a crisp and bright image, tracking your shots becomes easier, helping you improve your game.
Maintenance Tips For Your Setup
Last but not least, let’s talk about maintenance. After all, no one wants to replace an expensive projector after a few bad hits.
Protecting Your Projector from Stray Shots – Even the best golfers mishit from time to time. We recommend placing a cage or shield around your projector, especially if it’s ceiling-mounted. We learned the hard way that a stray shot can easily break the lens. We installed a simple wire mesh cage around the projector. It’s unobtrusive but effective.
Cleaning and Longevity – Dust is your projector’s enemy. We clean ours regularly and make sure to follow the manufacturer’s guidelines on maintenance. If you’re in a particularly dusty environment (hello, garages), look for projectors with built-in dust protection.
Topics That Might Interest You:
- How To Identify The Cost Of A Golf Simulator
- How to Start A Golf Simulator Business
- How Realistic Is A Golf Simulator
- Golf Simulator Vs. Golf Launch Monitor
- Golf Simulator Hitting Mat Guide
- Are There Special Balls For A Golf Simulator?
- Home Golf Simulator Design Ideas
I’m Khawar Iqbal, Founder of Golfsportal. I’m excited to be your guide in the world of Golf. At Golfsportal, I will keep you updated with insightful information that will help you improve your golfing experience and knowledge about what’s currently happening in the industry.